This is the first part. Part two is here.
Since starting as a learning designer last September there have been plenty of opportunities to develop my design thinking and practice in real-world situations. Instead of squeezing the odd project in here and there between tectonic school pressures, I get to devote decent stretches of time to solving really interesting learning challenges with design. I love it. Having said that, I still spend a fair amount of time in the evenings and weekends developing my skills through personal side-projects (the 3 Forts video was a recent example).
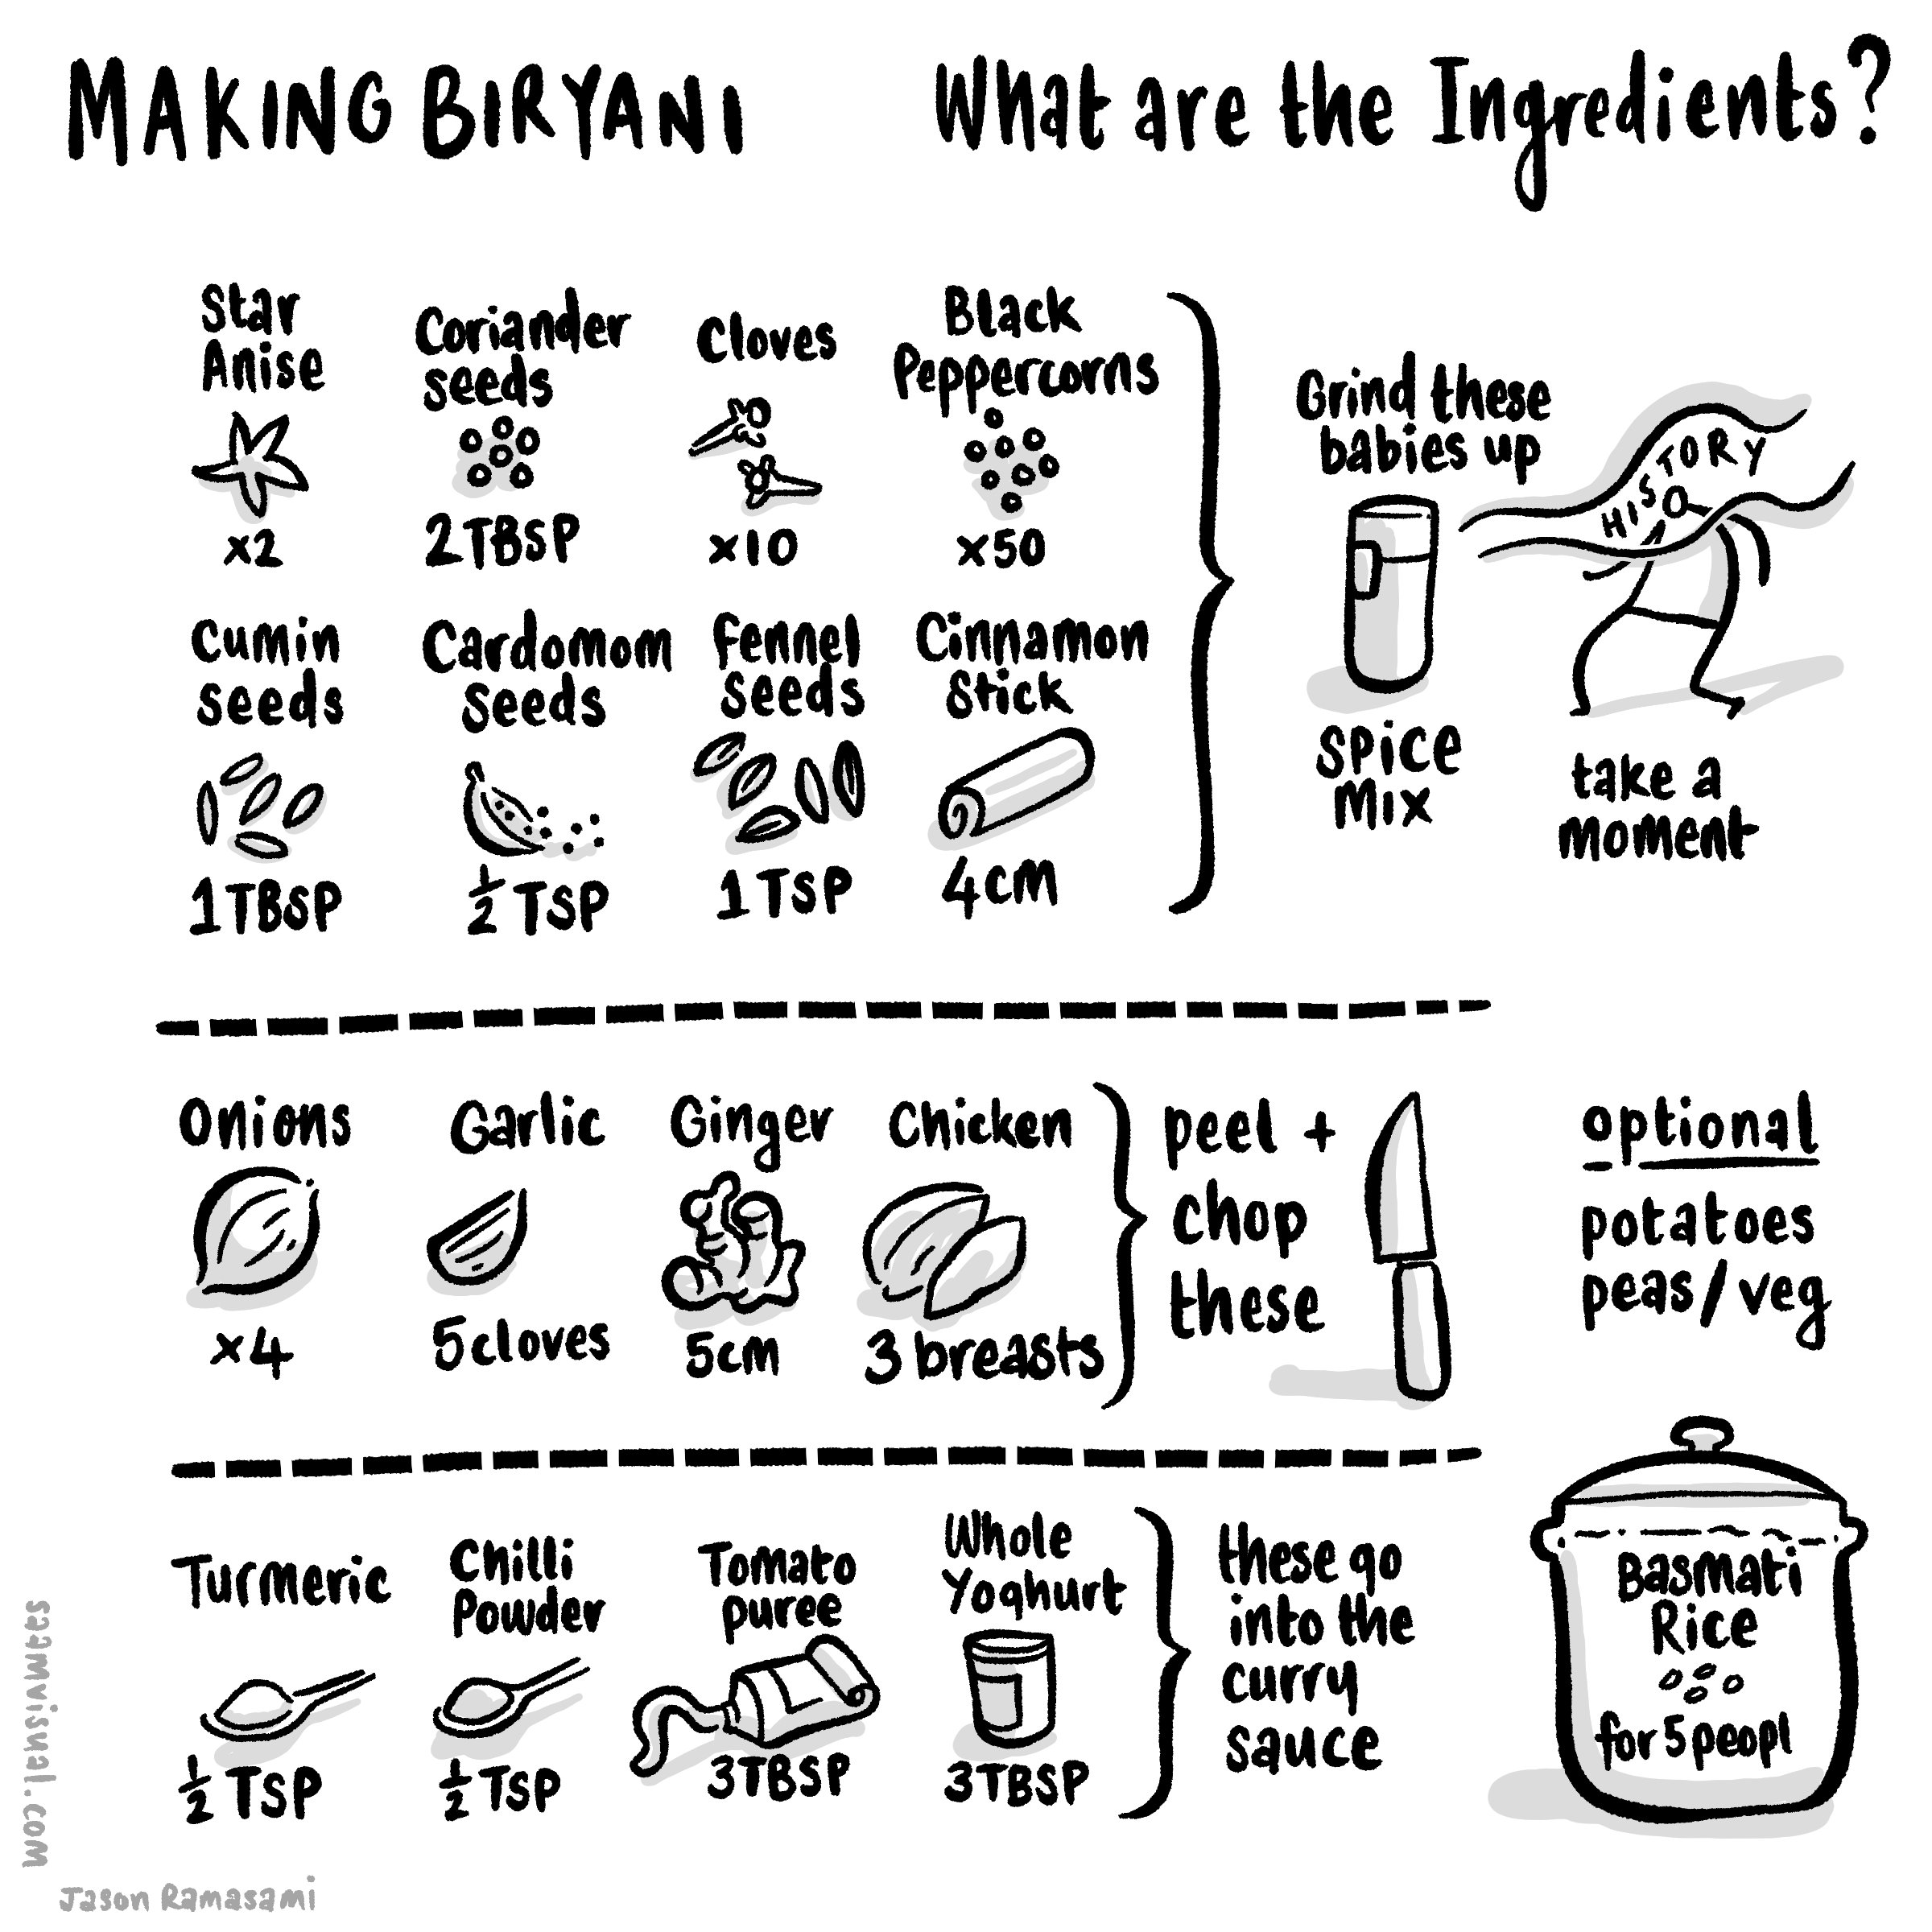
I wanted to document a little about another of these that has been chugging away at the moment: “Making Biryani”.
Cooking proper food
For a long time, my cooking skills have largely consisted of sauce jars and ready-meals but with the recent change in circumstance I have been doing a lot more proper cooking. When Guy Lodge tweeted about a biryani he was making I asked for some details. He sent me a really good recipe to start with. I have made it a few times now and each time it feels like an event to invite people round for. Thanks Guy for the link. And yes I really need to start inviting people round.
Explaining the making
I will say it outright: explainer projects either need to be paid well or have deep personal meaning because they require so much effort. If you ever you see one online, try to spot which of those it is because they are gruelling as you wrestle with the details. This is, of course, the joy of them as well - seeing a bunch of important details etch themselves on a huge virtual canvas in an understandable way is a lovely thing.
The 3 Forts video was meaningful for me (my first marathon across amazing scenery combined with learning how to draw and animate maps): it merited the time and I don’t regret it (much).
“Making Biryani” is similar - to be able to make something this tasty from all of these delicious ingredients is a kind of turning point in my own growth as a person (honestly I’m not over-egging this: I have an immigrant, working-class background and this is a huge thing). Also, I have been chipping away at the RSA/Animate whiteboard-style explainer format for a while. The Religion and Worldviews Paradigm piece I did last year for the RE council was a big step in that direction but there’s still room to travel - and this project is how I intend to make those steps.
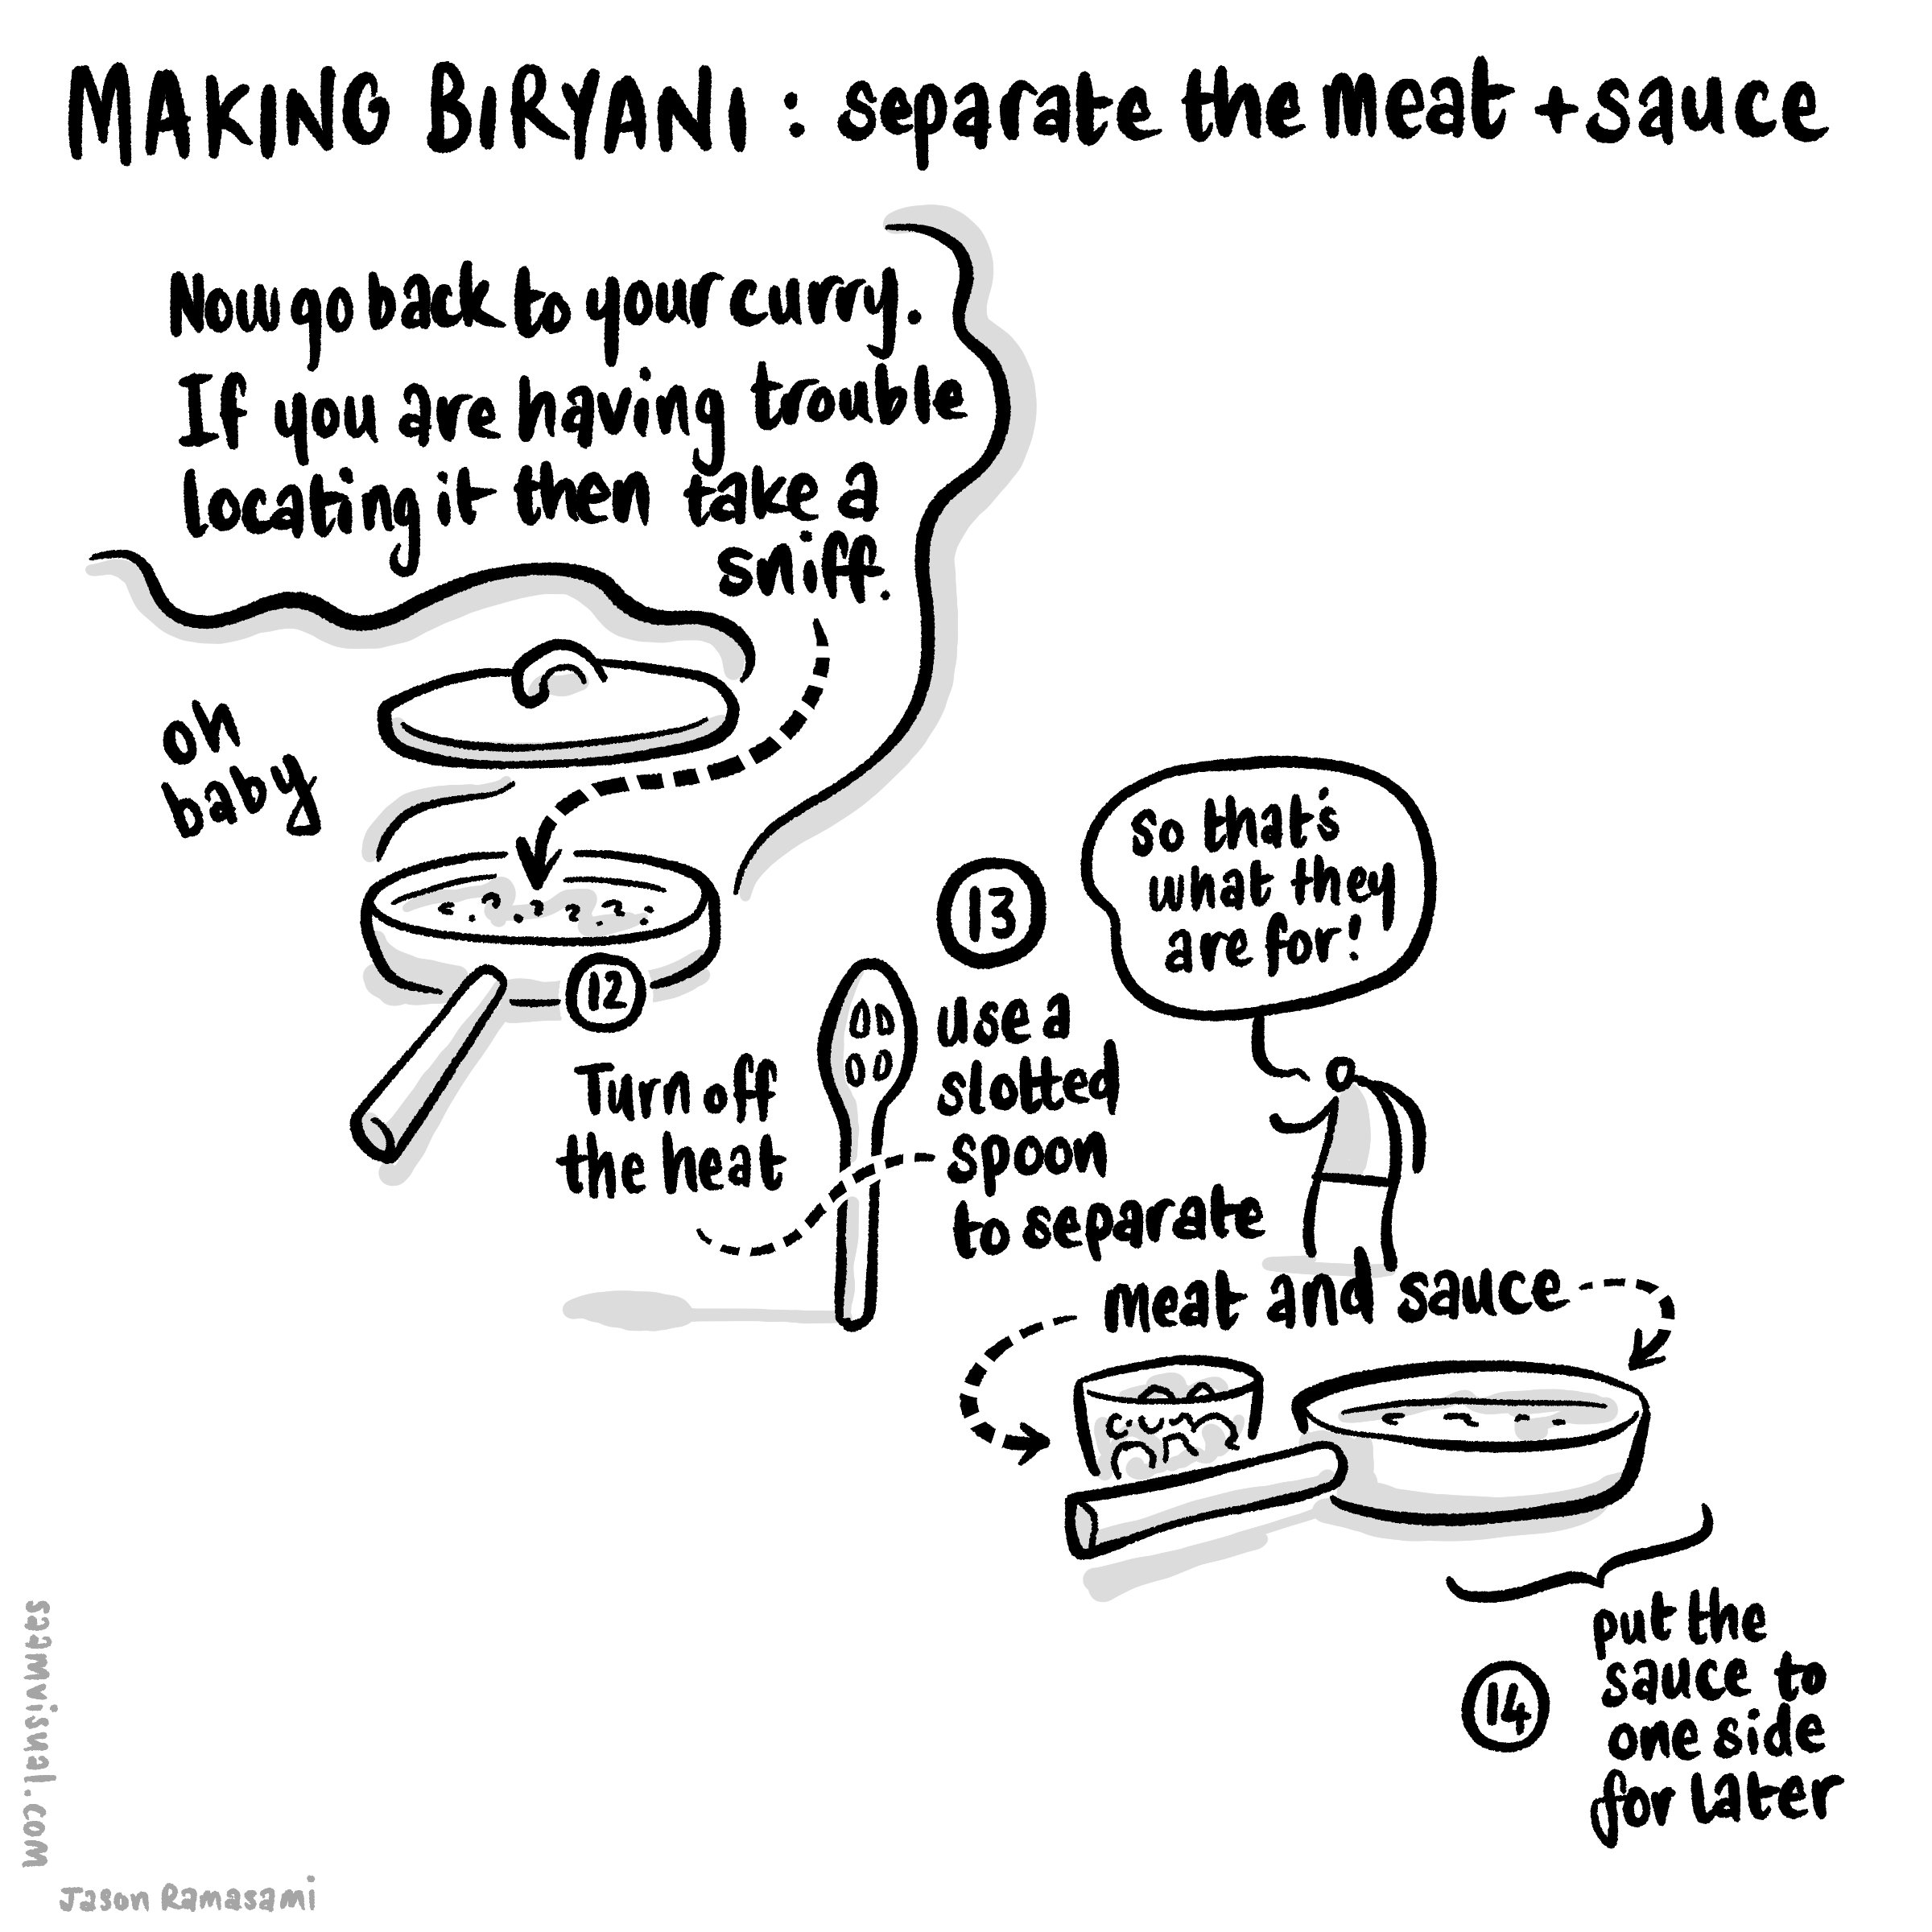
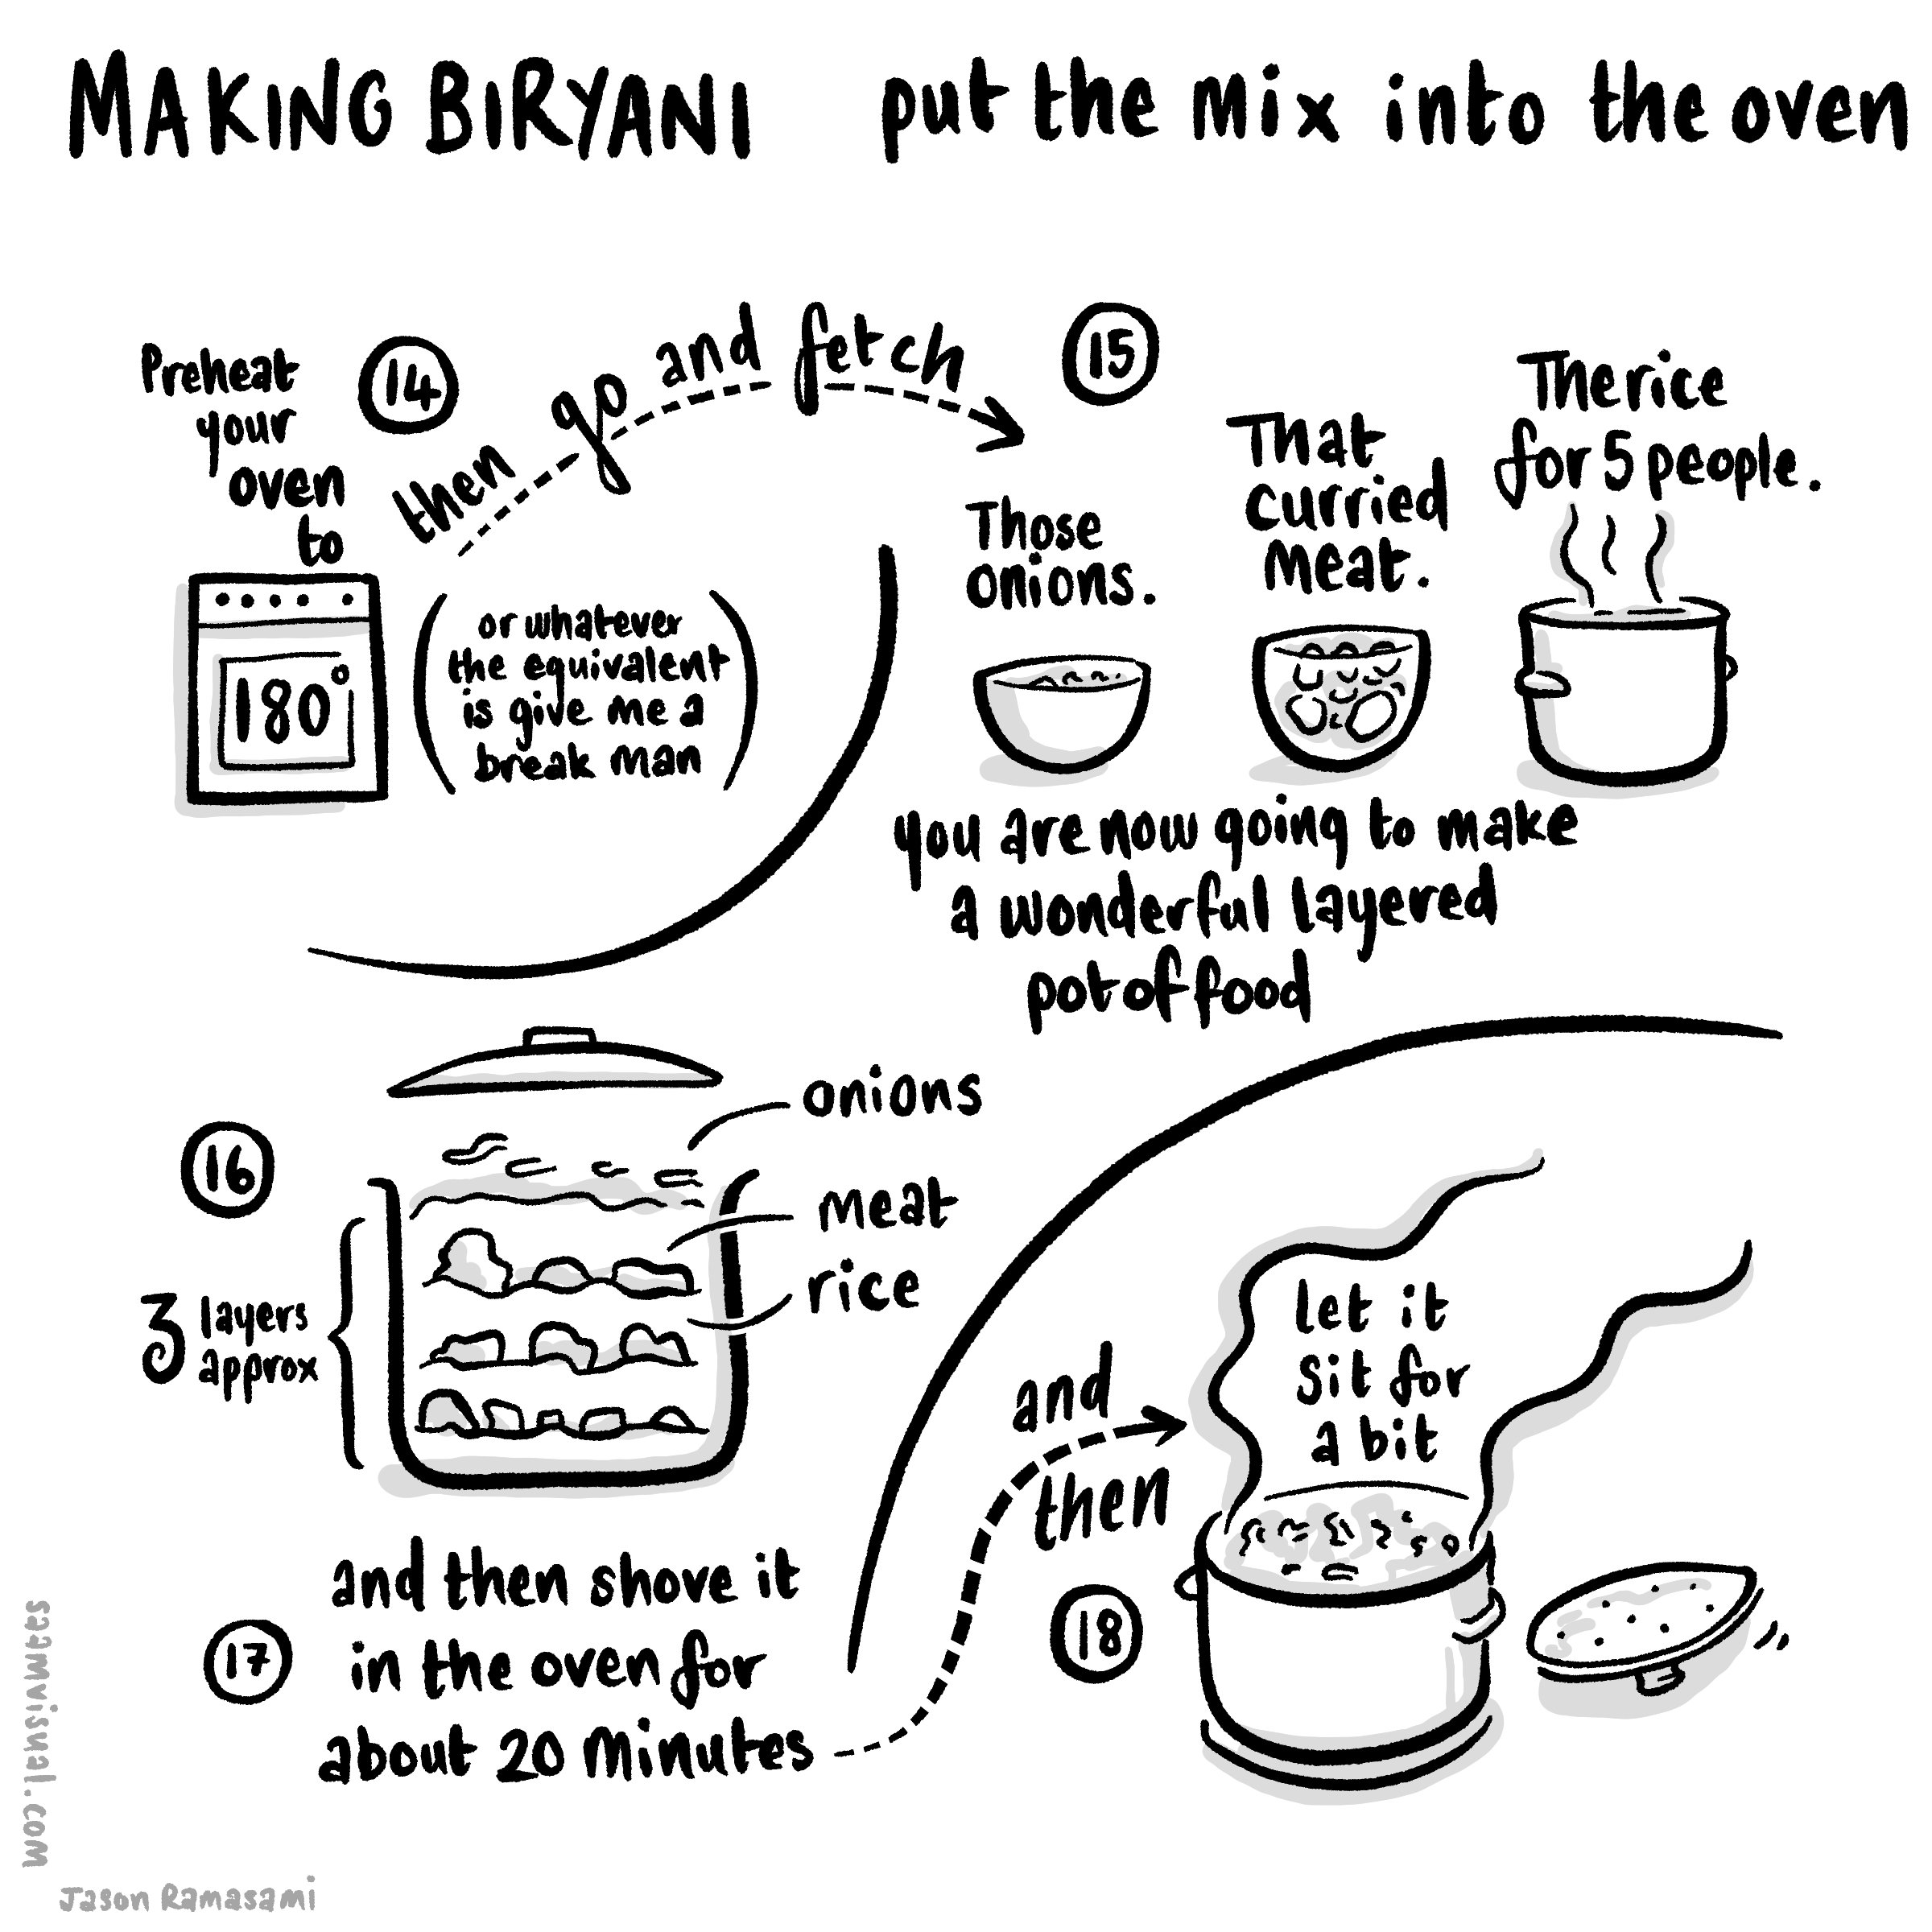
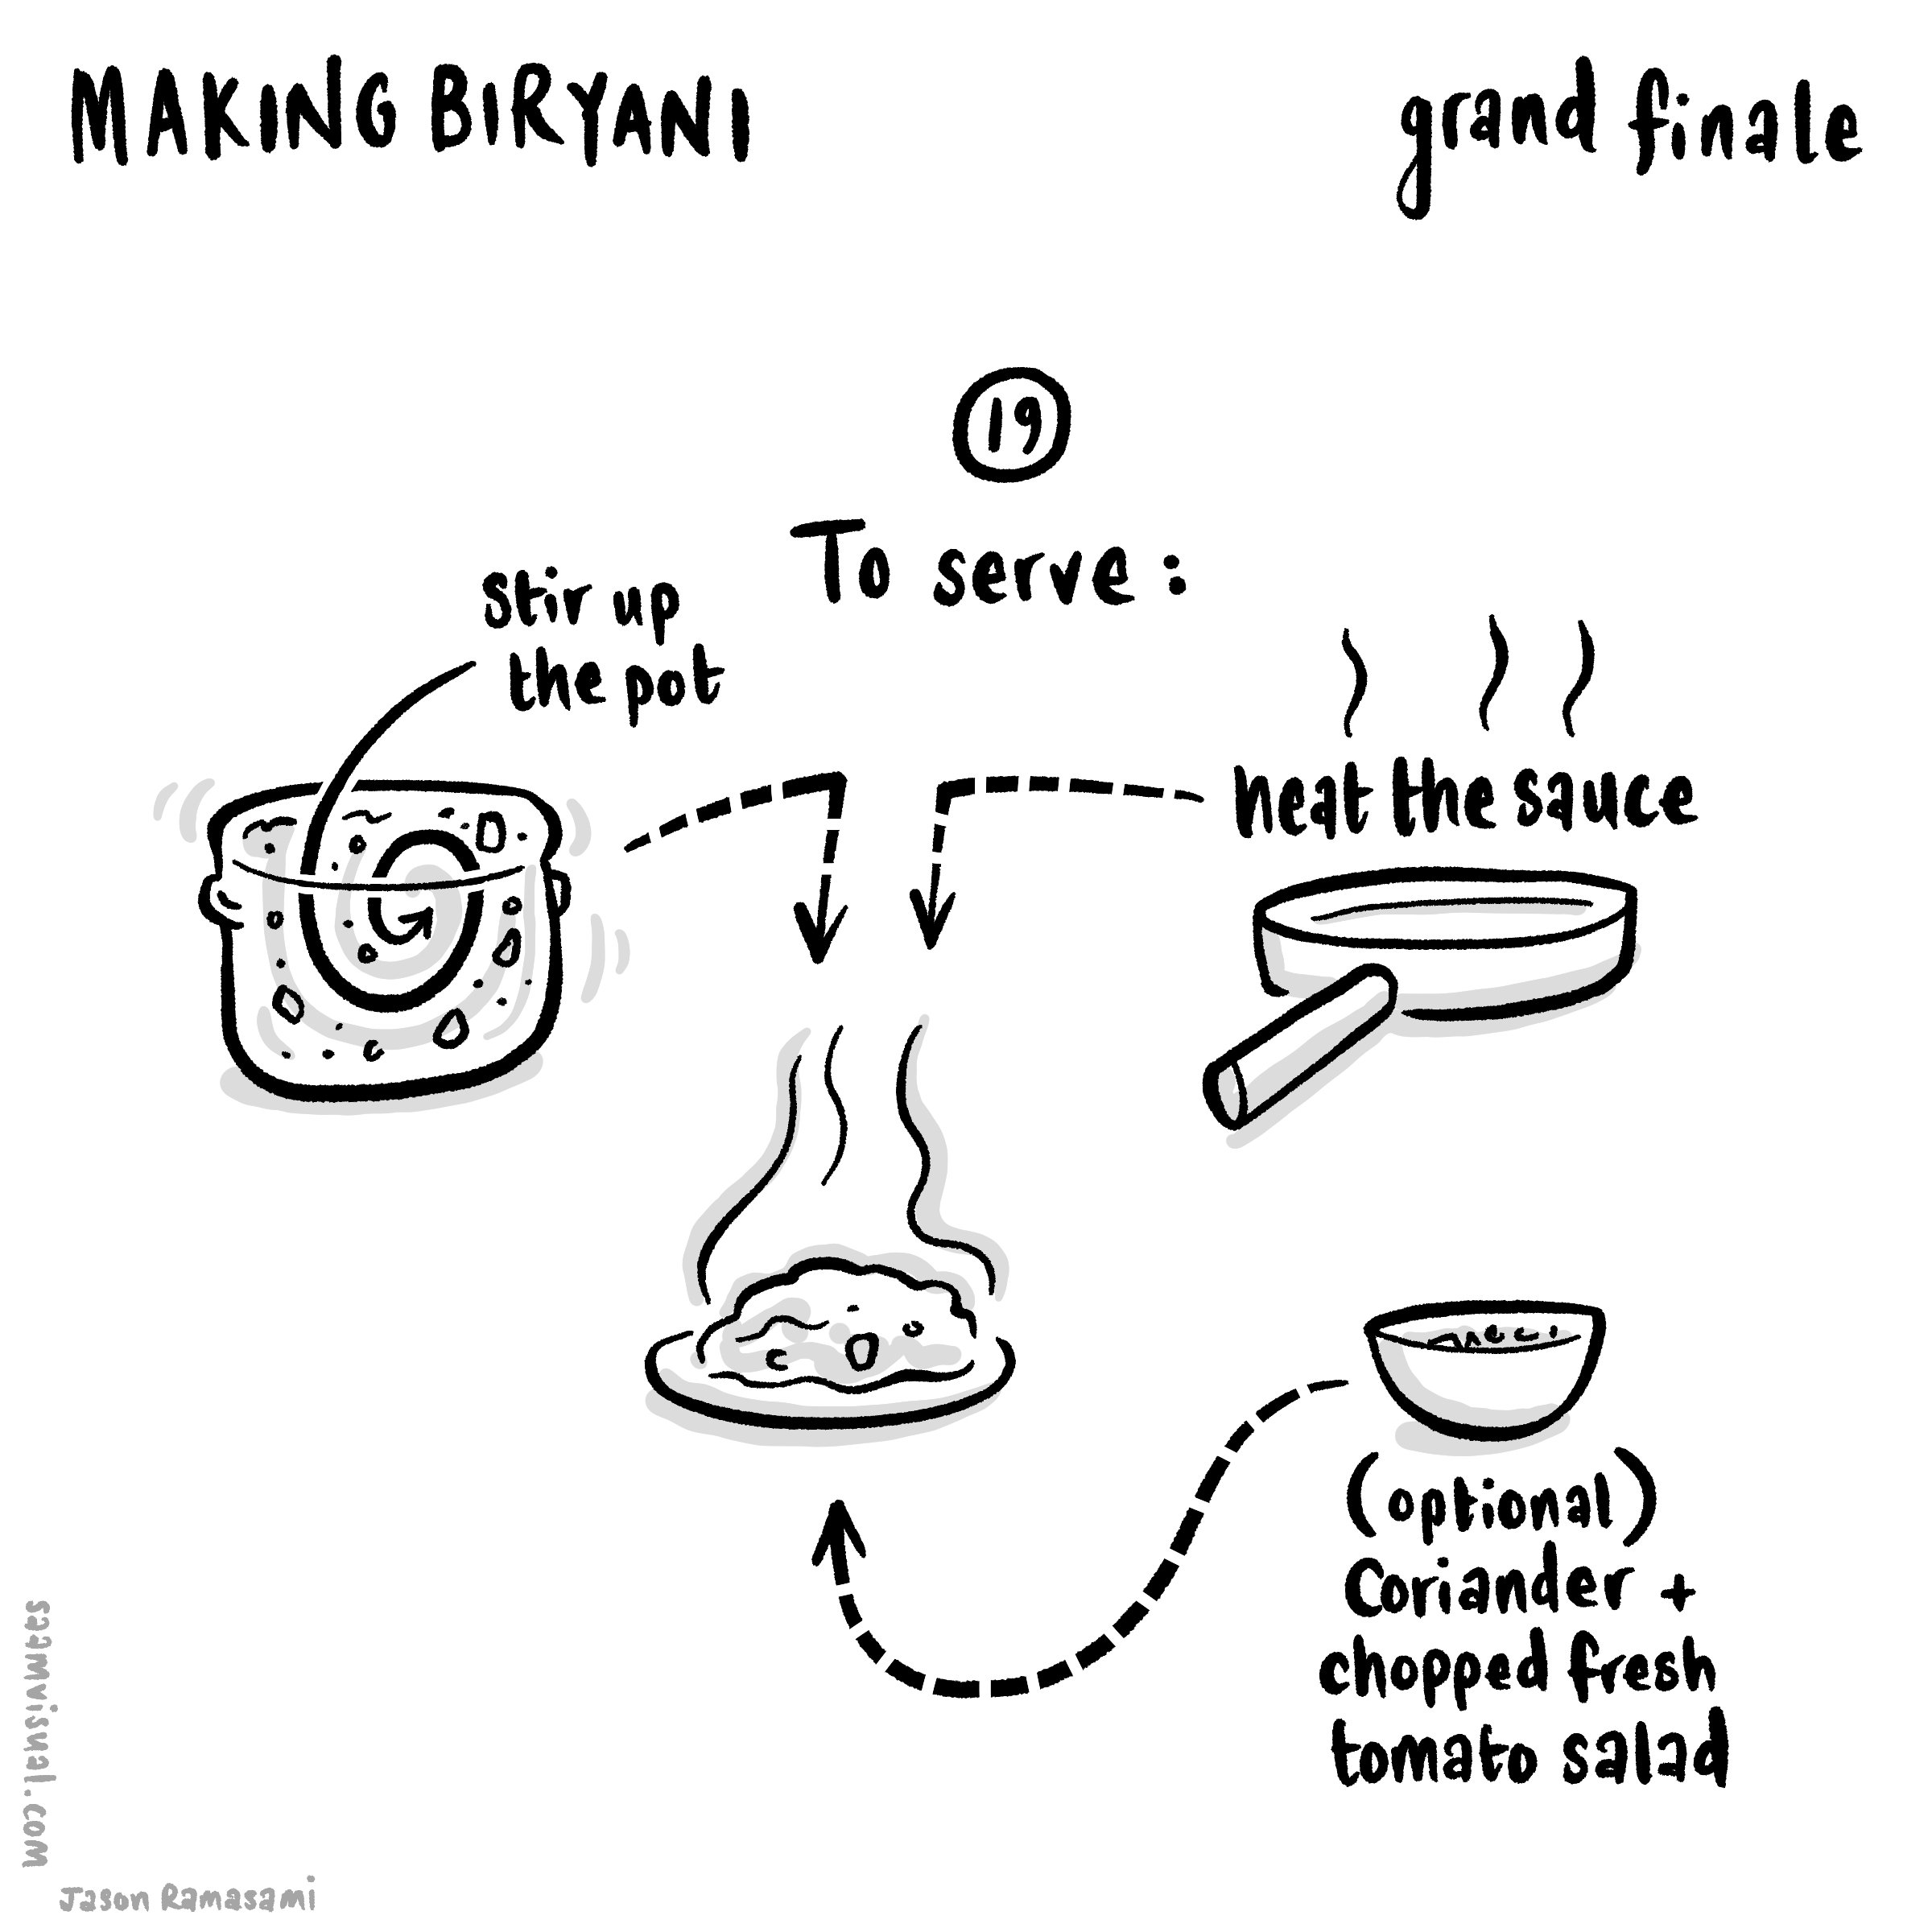
Just to be clear: in this piece I am exploring how to communicate the process of cooking a delicious meal by animating hand-drawn notes to a scripted narration.
Initial notes
I did some early sketches using a square-formatted page thinking this would work as a serious if about 8 Instagram images.

My initial sketch broken into a few stages.
A More Detailed Slideshow (for instagram)
So after a bit of drafting I put this slideshow together.

Forming it into an explainer video
From here I have begun to think through how to create something that animates on a larger canvas. The proprietary vector¹ drawing layers in CSP are genuinely useful in these situations because you can go back to the original artwork and resize/appropriate if needed (something I find myself doing occasionally as the bigger form requires an adjustment).

Here is my initial attempt to corral the eight instagram square images into something continuous. As it turned out I had to scrap this after some initial efforts.
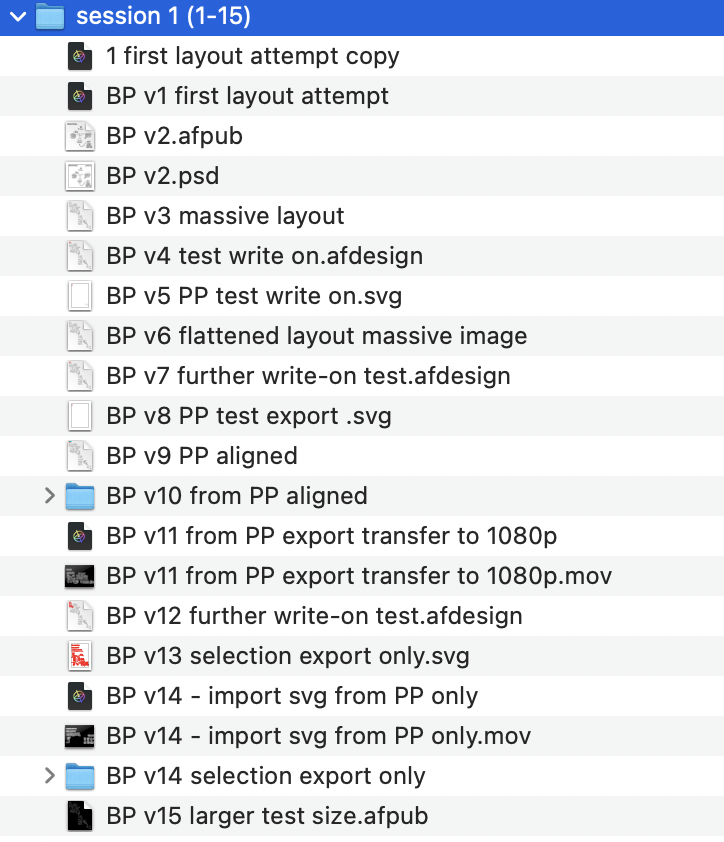
From here I began to do a dance between Affinity Publisher, Pixelmator Pro, Apple Motion and back again. I was careful to number and duplicate all of my steps and then group them into ‘sessions’. Here was session one:
Realising a few things needed tweaking I came back to it the next morning:

I thought it was simpler to just screenshot this instead of boring you with a blow-by-blow explanation.
This is the test export I produced - it has a few issues but some parts are working really well.
The principle technique being used here is to draw vectors over selected items with the pencil tool in Affinity Designer using the iPad pencil like so:

The red is a vector-drawn pencil stroke in Affinity Designer.
Then in Apple Motion (via the usual PP export option) I would create a write-on behaviour and time it carefully like so:
The vector lines are here in a bluey-purple and I have changed the opacity so you can see a bit of how I have done it. Notice that the ‘write-on’ behaviour for ‘Path 17’ is set to erase. In the actual project I have set the entire SVG group to ‘colorize’ as black so it completely masks it out.
At this stage I realised that there were some details I had missed and instead of rehanging the whole thing again I decided to take a break and get some air.
Some thoughts before closing:
making sure the main image is high-resolution enough is really important - in the next session I will re-export those vectors from CSP at twice the size. This version is borderline acceptable. It’s one of those things you can only figure out as you go. I got increasingly frustrated that I couldn’t zoom in with it looking a bit pixelated.
the write-on Apple Motion behaviour works quite well for most elements but it is hard to get handwriting to animate properly without it being excessively fiddly and time-intensive. I am looking for smart and cost-effective ways of doing this kind of stuff and I wasn’t about to do lots of individual lines unless it really required it. In the old days of similar OUP/REC work I did screen recordings of Procreate handwriting but this needs a slightly different approach - I am not sure what to do… (maybe just having it appear via a fade-in is enough?). A related question is: how much more/less effective is this for the audience if you DON’T see things being written? Is it just me being a fussy person sitting alone at his desk in the wee hours getting fixated over nothing? Does it matter to have it appear in this way or is the flow of logical information enough?
My instincts - with a bit of a break - are that if the script and storytelling are engaging then the images don’t have to be super-intensive… I think.
More to come.
(Part 2 - where the dish actually gets served is here)
¹CSP vectors don’t operate like the usual svg tools you find in Affinity, Pixelmator or Adobe - but they are genuinely helpful to have around and I never draw final art these days in CSP without it being on a vector layer.