I really wanted to post some notes on my workflow for this project before term time hits again, so here goes:
What is MELC?
Making Every Lesson Count is a book that Shaun Allison and Andy Tharby wrote a couple of years ago. In essence, it is about teaching for teachers. It strikes that rare balance between everyday practice and bigger principles derived from research. The immense success of the book among the teaching community speaks for itself - it has sold upwards of 7,000 with at least two reprints.
I got the opportunity to illustrate the book because I had developed a great working relationship with Andy illustrating lots of his blog posts. For some lovely unknown reason our visual-verbal chemistry just seems to work and so the door swung open when the book was being discussed.

I loved this project because I was able to be the pretty pink icing on an already delicious cake.
Now that the series has been developed into a range of subject-specific volumes I got another go at working with these guys. Over the last week I produced around 100 images for the next three books. What follows are some notes on my workflow - I hope that these are useful to you.
Manuscript Notes

For these I usually scrawl on a PDF of the manuscript using Notability. Doing this on an iPad in a pub allows the Author to talk freely as I highlight parts of the text and improvise ideas on the go. Notability is a workhorse for me - I have used it daily in my teaching for years now and it has rarely let me down. For multi-page annotation of PDF documents there is nothing better.
Rough Pencils

I took the original notes and put this together - the linework is deliberately loose - produced in Clip Studio Paint and Astropad Studio (see below).
Tidy Pencils

Getting a bit closer now - I create another layer and take a bit of time to tighten up the original strokes. Often I try and simplify things down to the essence.
Corrections and shading
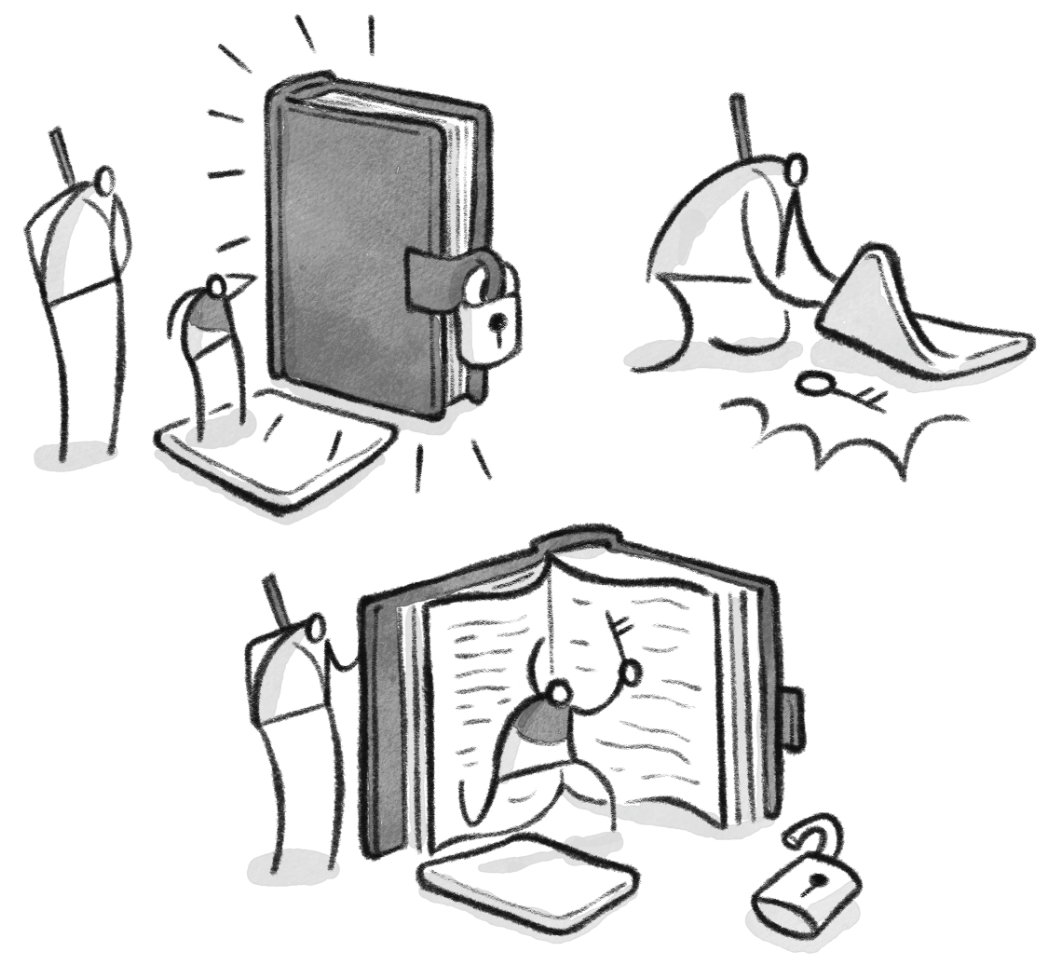
This is the bit where my hand hurts and I need to go out for a walk before my body shuts down entirely.
Get on with the process chat, Ramjam
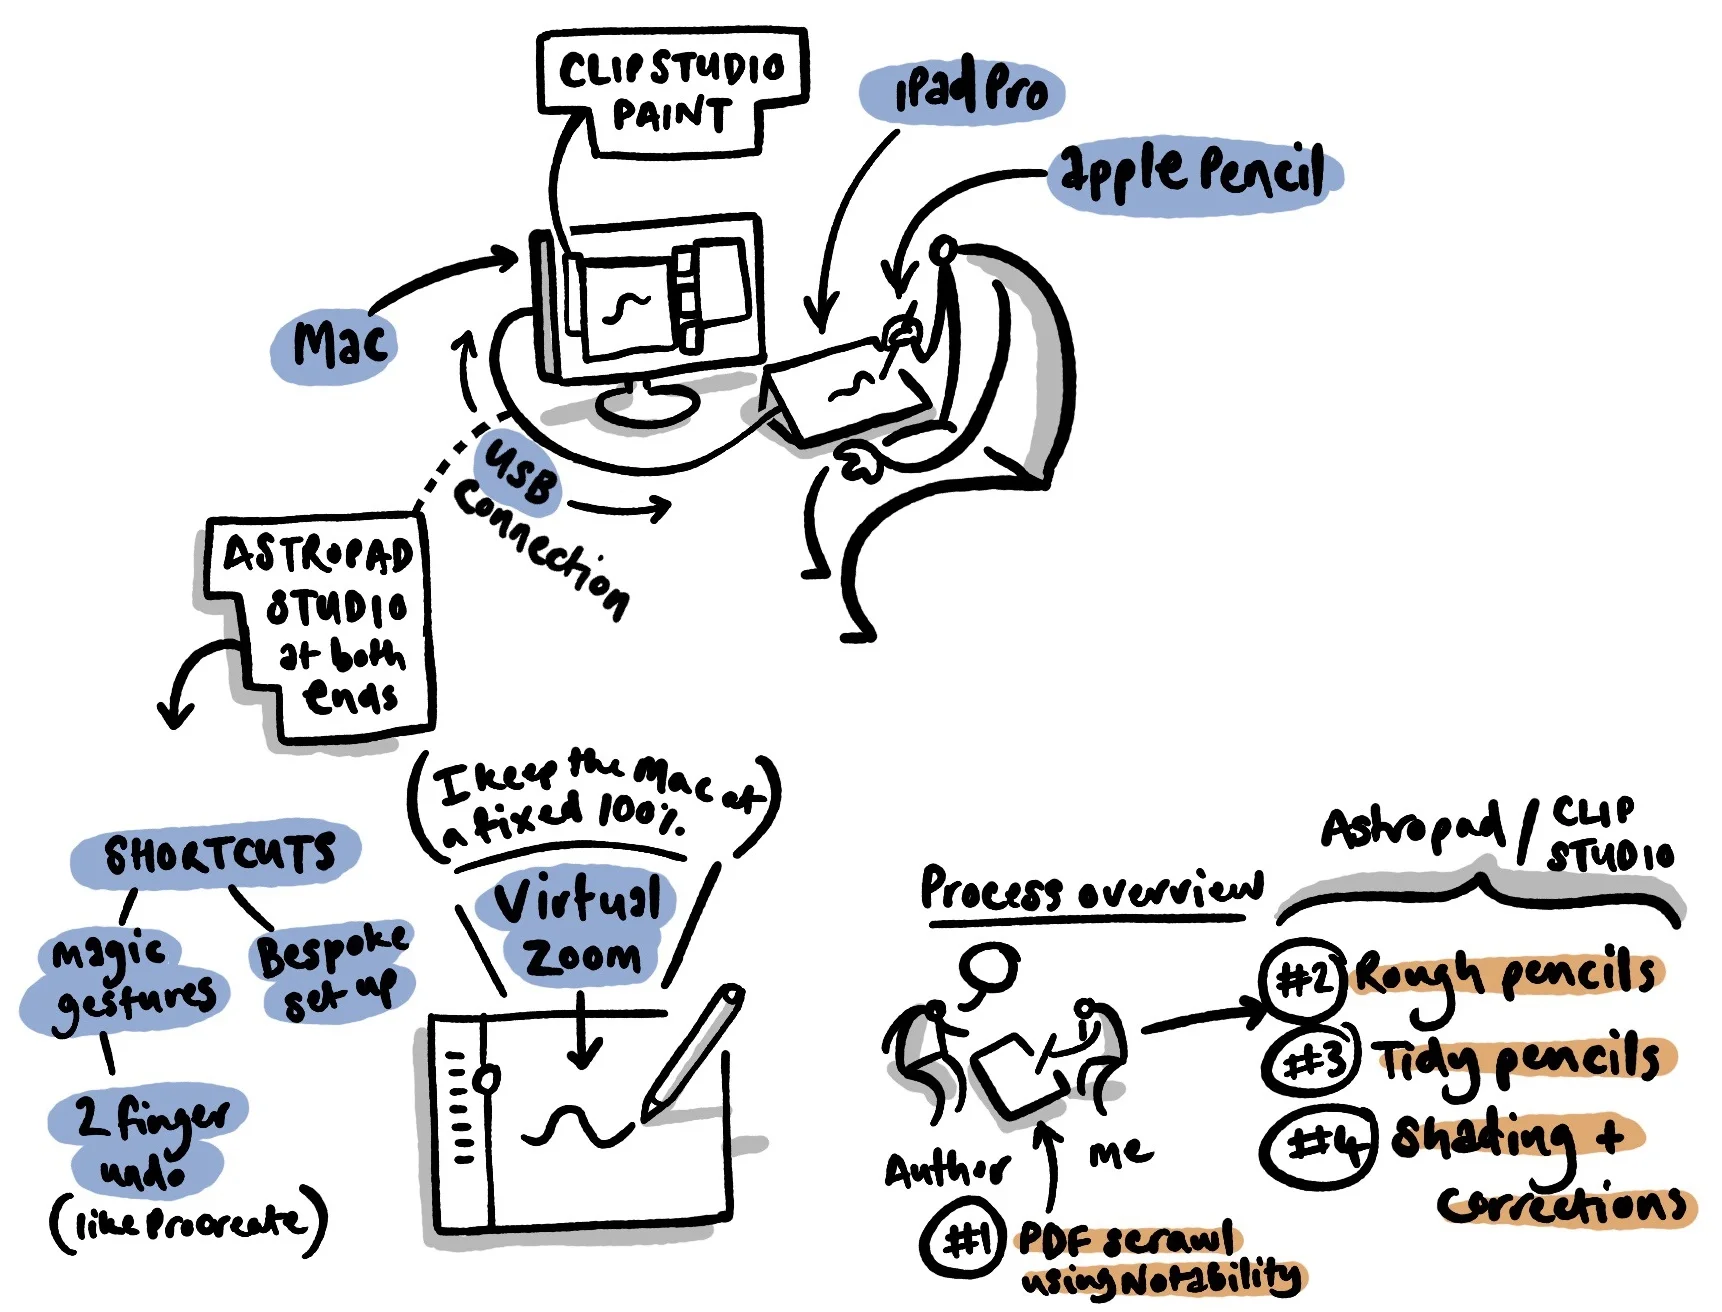
To create the final artwork, I used Astropad Studio via a large screen iPad Pro to draw these images in Clip Studio Paint. The experience was superb.
Here is the set-up for this particular job:
Please don't tell me how poorly presented this image is.
Some notes:
Clip Studio Paint - this is cheap, quirky, reliable and brilliant for multipage natural media creation. Seasoned pro artists swear by it, and I am in complete agreement. I use it in combination with a carefully selected bunch of Frenden's natural media brushes. It is a great piece of software.
Astropad Studio - some people will moan about the price, but if you produce artwork professionally, this is a serious alternative to the Intuos-style screens. The key benefits (on this job) were:
having a two-finger tap for undoing strokes (Procreate-style)
being able to easily set up a bespoke shortcut menu which freed me from my mac keyboard for most of the process
the virtual zoom is a major advantage - I tended to keep the main image at 100% on the mac screen and then used the iPad as a virtual zoom tool. I found that this was very fast and efficient feature
the Apple Pencil as an input method is a killer move baby. The sensitivity and handling is even better than using Procreate natively on the iPad pro. I loved drawing in this way.
the iPad screen itself
Gone are the days where I used to worry about the gap between something drawn 'on the computer' or drawn 'by hand'. With this set up the discussion isn't relevant any more.
If I missed anything or if you have any comments, please get in touch via email (saamvisual at gmail dot com), instagram or twitter.